Showing posts with label recipes. Show all posts

Beef and Lentil Soup


Just love this coolerweather now in Cyprus, still nice to go to the beach but in the evenings I'm
feeling a little chilly, craving something warm and comforting. How about a hearty, delicious soup full of goodness?! I found this recipe which is a meal in itself, served with lovely fresh bread, just perfect! Hope you like it!!

Ingredients

2 tbls Olive Oil
750g boneless stewing beef, cut into cubes
Salt & pepper
3 celery stalks,chopped
2 carrots, chopped
1 large onion,chopped
6 garlic cloves, chopped
1 ½ tsp chopped rosemary leaves
1 ½ dried oregano
1 can of tomatoes
2 cups of lentils,rinsed
1.3 cup fresh parsley

Method
Heat the oil in a large heavy pot over a medium heat. Sprinkle the beef with salt & pepper.
Add to the pot and brown on all sides until brown, about 8 minutes should do it. Using a slotted spoon, transfer the beef to a bowl and set aside. Add the celery, carrots, onion, garlic, rosemary and oregano to the pot. Sauté until the onions are transparent.
Return the beef to the pot and any accumulated juices from the pot. Add the tomatoes and cover with water. Bring to the boil. Now reduce heat to medium, cover and simmer until meat is just tender, stirring occasionally and if needed add a little water. Add the lentils and continue to cook until tender, add water if necessary but make sure you're left with  a lovely thick sauce. Season with salt and
pepper. Sprinkle with the fresh parsley.

Androulla xx

Chicken Korma


Apparently this week is 'Curry Week', good excuse to choose a recipe from this popular and much-loved cuisine. Curries always remind me of my Uncle Andy, a great lover of curries, who introduced me to my first curry dish. Growing up, I never liked this spicy dish and whenever my Mum cooked a curry, I preferred to have something else, until I visited my family in Cheltenham. My Uncle, who sadly died a few years ago, being a stubborn man, decided this won't do and off we went to have a family meal in a lovely little Indian restaurant. He ordered a few dishes,which he put in front of me, I tried them, but no, it just didn't work. Uncle Andy was not about to give up, so he called the waiter, ordered another dish, which was brought before me. I took a bite and that was it, I was hooked, that dish was Chicken Korma. Growing older, I have become more adventurous with my curry dishes but this one remains my favourite, because, like I said many times, food is not always just about stirring our taste buds but also about the memories and people attached to that particular food experience!!

Ingredients
2 tbl soil
1 large onion, chopped
4 cloves
4 cardamon pods, crushed
4 chickenbreasts cut into bit-sized pieces
3 garlic cloves, crushed
4 cm fresh ginger, peeled and grated
1 tsp ground coriander, 1/4 tsp allspice, 1 ½ tsp cumin,1/2 tsp turmeric,1 tsp mild
chilli pepper
2 tsp tomato puree
75g ground almonds
250ml chicken stock
200ml cream
Salt & pepper
50g flaked almonds

Method
Heat oil in a large saucepan and fry the onion, cloves and cardamom pods for a few minutes until the onion begins to soften.
Add the chicken, garlic and ginger and, after frying for 4 minutes, add all the remaining spices. Stir around in the pan, allowing them to release their flavour into the chicken.
Add the tomato puree, ground almonds, stock and cream and bring to a simmer. Cook for about 15 minutes until reduced to the consistency of thick cream. Taste and add seasoning.
Scatter over the toasted almonds and serve rice and naan bread.

Androulla
xxx

Meatloaf

I made this a few weeks ago for my guests, served warm with creamy mashed potatoes and veg., just delicious!! Also tasty when cold, I had plenty left over for the next day, served with salad and chutney. Something for the whole family, served hot or cold as a main dish with baked or mashed potatoes, perfect for picnics or sliced thinly in sandwiches for the kid's packed lunches, meatloaf is not just so easy to make but also economical and is on top of my list of the most versatile of dishes!! Enjoy!!


Ingredients

2 tbls Butter
1 medium onion, chopped
2 cloves garlic, minced
1 tsp paprika
2 cups day old bread, crust removed and diced
½ cup milk
2 tbls Parsley, finely chopped
750 g Beef mince
250 g Bacon, minced in food processor
2 Eggs
Salt & Pepper
Method

In a medium sized pot, start cooking the onion with the butter until transparent. Then add the garlic, continue to cook. Add the paprika. Remove from the heat and leave to cool.

Soak the bread in the milk and leave until all the milk is absorbed.

In a large bowl, combine the rest of the ingredients. Now add the onion and garlic and then the bread squeezing out any excess milk beforehand.

Pack into a loaf tin (coated with a little oil). And cook for about an hour and a half on 250 decrees.
Leave to cool slightly before serving.

Androulla

Fresh Pasta


Ok, I've made home-made pasta, yes, time-consuming but not difficult to make and the good news is that you can make your pasta on a day where you have the time, freeze it, forget about and it'll be ready to use on another day where you're busy making sauces and other dishes for your guests or family. And believe me it's pretty special serving your guests with something as delicious as home-made pasta!!! I will be posting some home-made sauces to go with your pasta on my Food page, so feel free to check them out.


Ingredients

3 cups of flour
5 egg yolks
½ tsp salt
Enough water to make smooth dough (if needed)


Method

1. Put your flour in a bowl or a work surface, mix in the salt. Now start adding the eggs one at a time and using your hands incorporate in the flour to form dough. If you can't get all the flour hydrated into the dough, add some of the water until you can form a nice firm dough.

2. Knead the dough for about 10 minutes, or until it is smooth and stretchy. Cover the dough with cling-film so it won't dry out. Allow the dough to rest for 20 minutes or more so that the proteins in the dough can relax and this will make rolling much easier.

3. I don't own a pasta machine so I just used my rolling pin. Just cut the dough in batches and roll out on a surface dusted with flour.

4. You'll need to roll the pasta down to between the thickness of a beer mat and a playing card; if you're making stuffed pasta like ravioli you need to get it thinner.


5. You can now cut it into thin strips and wrap around a pencil to make fussili (spiral shapes) or little squares which you can pinch in the middle to make farfalle (little bows or butterflies). This is the fun part and it's nice to include the kids and really any shape will do, so just let them have fun with it.


6. Lay the shapes on a floured surface until you've used up all your dough... When done, I placed them on a floured tray and froze them and then put them in a bag and back in the freezer.


7. To cook, put pasta in salted boiling water. Once your pasta floats to the surface that's when it's ready to serve with some delicious sauces.

Enjoy!!


Androulla xxx

Chocolate Eclair Cake


Whoever thought of making a chocolate éclair into a cake is my hero and a genius!! Well, of course a chocolate éclair is too small and leaves you screaming for more…..so here's a great big dish of this heavenly cake where you can have a great big chunk and drizzle it with as much chocolate sauce as your heart desires!!! Here's my version of this delicious, and surprisingly light and refreshing dessert. Enjoy!

Choux Crust

1 cup water
½ cup butter
1 cup flour
4 large eggs
Filling
6 cups milk
6 tablespoons sugar
6 tablespoons cornflour
3 eggs
vanilla
Topping
Whipped cream
Chocolate sauce

Method

Preheat oven to 200. Lightly grease a glass baking dish (9'' x 13'')

To make your choux pastry place butter and water in a medium saucepan and bring to the boil. Remove from the heat and stir in the flour.
Now start adding 1 egg at a time and mix thoroughly until you have a thick batter. Spread mixture in your dish, covering up the sides too.

Bake for about 30-40 minutes until golden brown. Remove from the oven a leave to cool. The pastry when cooked will bubble up, don't touch or push the bubbles down.

To make the filling, heat the milk in a saucepan. Meanwhile, beat the rest of the ingredients and then slowly add the warmed milk, beating all the time. Heat again and stir until your custard is thick and velvety.

Once your custard and pastry have cooled down, pour custard into pastry case and leave in the fridge until completely set.

Cover with whipped cream.

When you serve, just let your guests drizzle with as much chocolate sauce as they desire!!

You can use a readymade chocolate sauce but here's a really easy recipe for you:


Melt 300g chocolate in a bowl over simmering water. Warm 300ml cream with 150ml milk and 25g butter. Stir into melted chocolate. Can be made and chilled a day ahead. Great for other desserts and of course ice-cream!! Just Yummmm!!


Androulla xxxx

Kalon Prama (Semolina Cake)


Kalon Prama is a Cypriot semolina cake which literally translated into English means 'good thing', this cake with its lovely dense grainy texture and lemony syrup, I would say it is aptly named!! I made this cake for the first time last week and now I will be making it quite often, not just because it is absolutely delicious but also because of how simple and quick this recipe is!! After the ingredients, scales and mixer were set up on my work top, it took me just under 10 minutes before the cake was ready to pop in the oven, and ready by the afternoon to share with friends and family with a nice cup of tea or coffee!!


In the original recipe, finer semolina was used, but I prefer that grainy texture, so I used the courser one. I also made this cake a little dryer by using half the quantity of the ingredients for the syrup, so if you would like your cake to be sweeter and have a moister consistency, just double the syrup ingredients

Ingredients
200g Course Semolina
100g Sugar
100g Self-raising flour
100g Unsalted butter, cut into small pieces
Small pinch of mastic
½ Sachet Vanilla sugar
¼ tsp Baking powder
3 Eggs
Almonds, blanched
Syrup
200g Sugar
100ml Water
½ Sachet vanilla sugar
Juice of half a small lemon

Method
Preheat the oven to 180°C. Grease a 10 cm x 23 cm loaf tin.

To make the cake, using an electric mixer on medium speed, beat all ingredients, except the eggs and almonds, for 2 minutes. Add eggs, increase speed to high and beat for 5 minutes. Spoon batter into prepared tin. Use a knife to lightly mark small serving portions on top of batter, then top each portion with an almond, if you like.

Bake for about 25 minutes, or until a skewer inserted into centre of cake comes out clean.

When cake is nearly cooked, make the syrup. Place all ingredients in a saucepan over medium heat and stir until sugar dissolves. Bring to the boil and remove from the heat. When cake is cooked, pour a little hot syrup over hot cake, allowing it to absorb. Continue with all of syrup, allowing it to absorb after each addition. Serve and enjoy!!!

Androulla xx

Banofee Pie


Banoffee Pie!! One mention of this delectable pudding and most people's reactions would be a very long 'mmmmmmmmmmmmmm' and uttering the words 'Banofee Pie' in a state of ecstasy!!! Always under the impression that this delicious pie was an American invention, after some research, I was surprised to find out that it was, in fact invented in England!! Developed in 1972, in The Hungry Monk restaurant in East Sussex by chef, Ian Dowding and owner Nigel McKenzie, this gorgeous, creamy, decadent pudding has now become a firm classic all around the world and there have even been reports that it is a favourite at No. 10 and at Buckingham Palace!! Dowding claims that his pet hates on how this recipe has evolved is using biscuit crumb bases and aerosol cream, so here is the man's original recipe!! Enjoy!!


You will need a 10 x 1½ inch (deep) loose bottomed flan tin
Oven temp: 180 C / gas mark 4

PASTRY

250g / 9 oz plain flour
25g / 1 oz icing sugar
125g / 4½ oz butter (chilled)
1 egg and 1 egg yolk

Place the flour and sugar in a bowl, cut the butter into cubes and then rub it in to the flour / sugar until it resembles fine bread crumbs.


Work in the egg to form a paste.

Chill for half an hour then roll out to the thickness of a pound coin and line the flan tin.
Prick the base, line with parchment paper and weigh down with dry beans.


Cook for fifteen minutes then remove the beans and paper. Put the pastry case back into the oven and cook until it is evenly golden. Remove from the oven and cool.

FILLING

1 ½ tins of condensed milk, boiled to become a rich toffee (check note)
5-6 ripe bananas
425 ml / ¾ pint of double cream
1 teaspoon of instant coffee
1 dessertspoon of caster sugar
A pinch of ground coffee

Carefully spread the toffee over the pastry base.

Peel and split the bananas lengthways and arrange them on top of the toffee,

Whip the cream with the instant coffee (if they are granules they will dissolve as you whip the cream) and the sugar until it just holds its shape - take care not to over whip it.


Spread the cream over the bananas right up to the pastry edge then sprinkle sparingly with the ground coffee.

To make the caramel place a few unopened tins in a saucepan and cover with water and boil for 3 ½ hours. Always make sure there's water in the saucepan!! Since it takes so long to cook I would suggest you make a few and keep the tins in the fridge to use this delicious caramel sauce for other recipes or for a topping. They sell this caramel sauce ready-made in the U.K but I haven't seen them in Cyprus yet.

Androulla xxx

Tender and Crispy Chicken Legs with Sweet Tomatoes


They say we eat with our eyes first. Well, this recipe is just one of those dishes that is so inviting with all those lovely earthy colours you just want to get in the kitchen and get cooking!! This delicious recipe by Jamie Oliver is just so amazingly simple and quick to prepare, served with a greek salad, sprinkled with feta cheese and some lovely fresh bread is just perfect for a hearty family meal or for a dinner party with friends. Enjoy!!

Ingredients
Chicken legs, jointed
Sea salt
Freshly grounded pepper
I big bunch of fresh basil, leaves picked, stalks finely chopped
2 big handfuls cherry (whole) and plum tomatoes ( halved)
I yellow pepper, cut into strips ( I added this ingredient just to add more colour)
1 whole bulb garlic, broken into cloves and peeled
Olive oil
410g tinned cannellini beans or 2 handfuls new potatoes

Method
  • Preheat your oven to 180°C/350°F/gas 4.
  • Season your chicken pieces all over and put them into a snug-fitting pan in one layer. Throw in all the basil leaves and stalks, then the tomatoes and peppers.. 
  • Scatter the garlic cloves into the pan and drizzle over some olive oil. Add the beans or potatoes. Mix around a bit, pushing the tomatoes underneath. Place in the oven for 1½ hours, turning the tomatoes halfway through, until the chicken skin is crisp and the meat falls off the bone. 

That's it…..just too simple…enjoy!!
Androulla xx

Spanakopittes


Watched an episode of the Barefoot Contessa (Ina Garten) on the Food Network where she made these mouth-watering little triangles,filled with spinach,feta and added pine nuts. I just didn't have time to write everything down but found the recipe. Even though I am proud of my cookbook collection, I am grateful for the amazing choices we have with the internet and T.V!!!

Ingredients

· 1/4 cup olive oil
· 1 cup chopped onion
· 3 Spring onions, white and green parts, chopped
· 2 (10-ounce) packages frozen chopped spinach, defrosted
· 4 extra-large eggs, lightly beaten
· 3 tablespoons freshly grated Parmesan cheese
· Plain dry bread-crumbs
· 1 teaspoon grated nutmeg
· 2 teaspoons salt
· 1 teaspoon freshly ground black pepper
· 2 cups small-diced feta cheese
· 3 tablespoons toasted pine nuts
· 24 sheets frozen phyllo dough, defrosted
· 1/4 pound unsalted butter, melted
· Sea salt

Method

Preheat the oven to 375 degrees F.

Heat the olive oil in a medium saute pan, add the onion, and cook for 5 minutes over medium-low heat. Add the scallions, and cook for another 2 minutes until the scallions are wilted but still green. Meanwhile, gently squeeze most of the water out of the spinach and place it in a large bowl.

When the onion and scallions are done, add them to the spinach. Mix in the eggs, Parmesan cheese, 3 tablespoons bread crumbs, the nutmeg, salt, and pepper. Gently fold in the feta and pine nuts.

Place 1 sheet of phyllo dough flat on a work surface with the long end in front of you. Brush the dough lightly with butter and sprinkle it with a teaspoon of bread crumbs. Working quickly, slide another sheet of phyllo dough on top of the first, brush it with butter, and sprinkle lightly with bread crumbs. (Use just enough bread crumbs so the layers of phyllo don't stick together.) Pile 4 layers total on top of each other this way, brushing each with butter and sprinkling with bread crumbs. Cut the sheets of phyllo in half lengthwise. Place 1/3 cup spinach filling on the shorter end and roll the phyllo up diagonally as if folding a flag. Then fold the triangle of phyllo over straight and then diagonally again. Continue folding first diagonally and then straight until you reach the end of the sheet. The filling should be totally enclosed. Continue assembling phyllo layers and folding the filling until all of the filling is used. Place on a sheet pan, seam sides down. Brush with melted butter, sprinkle with flaked salt, and bake for 30 to 35 minutes, until the phyllo is browned and crisp. Serve hot.

Androulla xx

Herb Crusted Salmon


Made this quite a few times, so simple, so quick and so delicious. Served with roasted wedged potatoes, this is one for the whole family!!! Like a healthier version of fish and chips! Enjoy!!

· 3 slices white sandwich bread
· 1 cup fresh parsley
· 2 tablespoons olive oil
· Coarse salt and ground pepper
· 4 skinless salmon fillets, (6 ounces each)
· 2 tablespoons Dijon mustard
· 3 tablespoons fresh lemon juice
· 5 ounces baby spinach
· 1/2 medium red onion, thinly sliced

Preheat oven to 450 degrees. Line a baking sheet with aluminum foil; set aside. In a food processor, combine bread, parsley, and 1 tablespoon oil; season with salt and pepper. Pulse until coarse crumb

Place salmon on prepared sheet; season with salt and pepper. Spread top of fillets with Dijon; top with crumb mixture, pressing gently to adhere. Roast until salmon is opaque throughout, 11 to 13 minutes.

Meanwhile, in a large bowl, combine lemon juice and remaining oil; season with salt and pepper. Add spinach and onion; toss to combine. Serve salmon with spinach salad.

Androulla xx

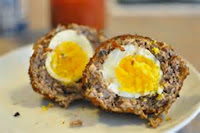
Scotch Eggs


The English have a knack with 'portable' picnic food, like pasties, pies, sausage rolls and one of my favourites, the delicious scotch egg, always bringing back memories of a sunny day, sitting outside a pub with good company, and an ice cold beer. London's exclusive store Fortnum and Mason, claim that they invented it in 1738, using a gamier meat, like a strong Victorian pate and a pullet's egg rather than hen's eggs, which sounds good but here I have the recipe for the Scotch egg we know and love. Enjoy!!

6 eggs
200g plain sausagemeat
200g pork mince
3 tbsp chopped mixed herbs (chives, sage, parsley and thyme)
A pinch of ground mace
1 tbsp English mustard
Splash of milk
50g flour
100g breadcrumbs
Vegetable oil, to cook

1. Put four of the eggs into a pan, cover with cold water and bring to the boil. Turn down the heat and simmer for five minutes, then put straight into a large bowl of iced water for at least 10 minutes.

2. Put the meat, herbs, mace and mustard into a bowl, season and mix well with
your hands. Divide into four.

3. Carefully peel the eggs. Beat the two raw eggs together in a bowl with a splash of milk. Put the flour in a second bowl and season, then tip the breadcrumbs into a third bowl. Arrange in an assembly line.

4. Put a square of cling film on the work surface, and flour lightly. Put one of the meatballs in the centre, and flour lightly, then put another square of cling film on top. Roll out the meat until large enough to encase an egg and remove the top sheet of cling film.

5. To assemble the egg, roll one peeled egg in flour, then put in the centre of the meat. Bring up the sides of the film to encase it, and smooth it into an egg shape with your hands. Dip each egg in flour, then egg, then breadcrumbs, then egg and then breadcrumbs.

6. Fill a large pan a third full of vegetable oil, and heat to 170C (or when a crumb of bread sizzles and turns golden, but does not burn, when dropped in it). Cook the eggs a couple at a time, for seven minutes, until crisp and golden, then drain on kitchen paper before serving.

Androulla xxx

Salmon Fish Cakes


It's hot, hot, hot….I was talking with some friends a couple of days ago listening to their remarks about how it's too hot to be spending too much time in the kitchen, cooking complicated dishes. So today I have a tried and tested recipe that is simple and light, served with a salad and some boiled new potatoes.Simply delicious!!

Ingredients
300g skinless salmon fillets
450g Mashed potato
30g gherkins, chopped
1 tbsp capers, rinsed and chopped
½ tsp English mustard powder
2 tbsp chopped flat-leaf parsley
80g soft white breadcrumbs
3 tbsp plain flour
1 egg, beaten
2 tbsp olive oil

Method
1. Place the salmon in a shallow dish and cover with boiling water. Cover with clingfilm and leave for 12–15 minutes until the fish is cooked and can be flaked.
2. Meanwhile, mix the cold mashed potato with the gherkins, capers, mustard, parsley and 3 tbsp breadcrumbs.
3. Remove the fish from the water and dry well with kitchen paper, then break into large flakes, season and gently mix into the potato. Form the mixture into 4 patties and dust both sides with plain flour. Dip the patties into the egg before coating in the remaining breadcrumbs.
4. Heat 1 tbsp olive oil in a large frying pan over a medium heat. Fry the fish cakes on one side for 4–5 minutes until golden then turn over, add the remaining olive oil to the pan, and fry for another 4–5 minutes. Serve with lemon wedges and your side condiment of choice.

Enjoy!!

Androulla xx

Cheesecake


This recipe was given to me years ago by Dimitra,my neighbour's 15 year old daughter !!! I love it when kids show enthusiasm about cooking . When you watch children at play, you will always see them pretending
to cook, making cakes, and mixing things in their toy pots and pans, so to include them in the day to day kitchen activities will just come naturally to them. I made sure my daughter was always with me while cooking, asking her to pass the pepper, mix the eggs or prepare the vegetables and all the time listening to my running commentary on what I was doing, a habit that I catch myself doing now, even if I'm on my own!! Anyway, I hope you enjoy Dimitra's very scrumptious, very simple cheesecake recipe.

Ingredients
Base
1 packet Digestive biscuits
125g Butter (softened)
Filling
200 g Cream Cheese
1 packet dream topping
1 tin Condensed milk
½ Cup of Milk
Juice of 3 lemons

Method
Whiz biscuits in food processor until they resemble fine
breadcrumbs. Add softened butter and mix. Place your mixture in a 24 cm round
dish and press to line the bottom. Chill for a few hours until your biscuit
mixture feels firm.
Beat the cream cheese with the condensed milk. Whisk dream
topping with the milk. Now mix the two mixtures together and start adding the
lemon juice slowly until the mixture becomes thick and silky.
Pour cheese mixture on top of the biscuits and smooth down,
chill for a few more hours.
Just before you serve add topping of your choice. You can
make a sauce from  any fruit or use a tin
or fruit topping. I usually use the forest fruit topping or fresh strawberries
when in season.

Androulla xx

Tiramisu


I've been checking to find the history of Tiramisu and have come across a few versions of its origin..this is my favourite so I shall stick with this one. Apparently back in the late 19thcentury the competition between bordellos was fierce, so as the story goes, one bordello offered espresso coffee as a complimentary beverage after a customer patronized it's establishment. Once word got out, the others followed suit to attract more customers. As the competition increased so did the complimentary
drinks, from just espresso, to espresso and savoiardi biscuits, which were commonly dunked in the espresso, and possibly a cordial or wine. One very ingenious Madam in particular took all of these ingredients, combined them. And created this confection adding eggs and Mascarpone cheese to the filling. The name Tiramisu or Tira Mi Su means "Pick me up" or ''make me happy'' in Italian, and it is translated to mean "an energy booster." The patrons originally enjoyed the energy boost that espresso
gave them after sex so that they could carry on and on about the rest of the day instead of wanting
to take a nap afterwards!!!! So basically this dessert is a scrumptious, delectable version of Viagra!!! Anyway, Ladies and Gentlemen, here's the recipe, and I wish you a great weekend!!

Bon Appetito!

Ingredients

500 grams of Mascarpone
100 grams of heavy cream
120 grams of sugar
100 grams of cocoa
 6 eggs
1 x 30cc glass of coffee
1 x packet of ladies fingers biscuits
Coffee
liquor

Method

Mash

the Mascarpone cheese, and mix with the beaten cream.

 Separate

the egg yolks (set egg whites aside in a separate bowl) and add 60 grams of the

sugar and whisk until creamy.

Soak

the ladies fingers in coffee and place at the bottom of a dish.

Add

the egg yolk mixture to the cream and cheese mixture and beat until creamy.

Beat

the egg whites until smooth and add the liquor. Add to the egg and cheese

mixture.

Pour

some of the mixture on top of the biscuits and dust with cocoa powder and then

make a few layers of cream and biscuits finishing with a top layer of cream,

dust again with the cocoa and then place in the fridge for at least 45 minutes.
Androulla xx

Roasted Caprese Tomatoes with Basil


'The secret of genius is to carry the spirit of the child into old age, which means never losing your enthusiasm'....what a brilliant quote by Aldous Huxley, and how true and wise to never lose that enthusiasm!!! The toys of our childhood have been discarded but now we must find new ones to feel joy and that enthusiasm of our childhood. Cooking for me is not just making food to fill our stomachs, it's about being creative and having fun and my new toys are my pots and pans and all the ingredients available to me. And nothing puts a huge smile on my face as do my herbs that I have growing in my garden and that feeling when I just step outside to take a cutting to include in my cooking!!  I'm particularly proud of my Basil plant which is treated like  my doll, being groomed and taken care of and admired and today I have a really simple but tasty recipe that I hope you will enjoy that includes this wonderful herb. Enjoy!!

Ingredients
4 large, ripe tomatoes
1 tablespoon olive oil
2 tablespoons Balsamic vinegar
1 teaspoon sugar (optional)
salt & pepper to taste
4 thin slices Mozzarella
4 basil leaves
for the dressing
small handful fresh basil
1 garlic clove
juice of ½ lemon
2 tablespoons olive oil
salt to taste
to serve
wild rocket

Instructions
    * Pre-heat the oven to 180°c.
    * Halve the tomatoes and place on a non-stick baking sheet, cut side up.
    * Drizzle over the olive oil and Balsamic and season with the sugar (if using), salt and pepper.
    * Roast for 20-25 minutes until the skins are blistered then top the 4 bottom halves with the mozzarella and roast for another 5 minutes.
    * Remove from the oven and place a basil leaf on each bottom half then close with the top half.
    * To make the dressing, blitz all the ingredients in a small food processor until the basil is finely chopped.
    * Serve the tomatoes on a bed of wild rocket, drizzled with the dressing.

Androulla xx

Cheesecake Flan

 This week I'm tempting you  with a recipe that I found recently and have already made it twice...it's called Cheesecake Flan but resembles more a super creamy, super rich crème caramel or crème brulee than a flan and so, so pleasing to the taste buds! The recipe asks you to use 12 ramekins, I feel 1 ramekin is a ridiculously small amount and I fear that maybe my guests will be too embarrassed to ask for a second or even third ramekin, so I chose to make it in one oven dish, place it in the middle of the table, allowing my guests to help themselves to their hearts delight!! Enjoy!!!

Ingredients
* 2 cups sugar
* 1/4 cup water
* 12 ounces cream cheese, at room temperature
* 3 large eggs, at room temperature
* 1 (14-ounce) can sweetened condensed milk
* 1 (12-ounce) can evaporated milk
* 1 1/2 cups milk, at room temperature
* 1 teaspoon vanilla extract

Directions

  • Special equipment: 10 (3 1/2-inch) ramekins
  • Set a large bowl of ice water next to your stovetop. Place the sugar and 1/4 cup of water in a medium saucepan over medium-high heat. Using a pastry brush, stir the sugar occasionally, being careful not to get any grains stuck against the sides of the saucepan, until it has all dissolved. Swirl the saucepan every minute until the sugar becomes a golden reddish-brown, about 10 to 15 minutes. Shock the bottom of the saucepan by placing the bottom in the ice water to stop the cooking, and then equally divide the caramel into 10 to 12 (3 1/2-inch) ramekins and set aside.
  • Preheat your oven to 325 degrees F.
  • Using an electric mixer, beat the softened cream cheese with the eggs on low speed to combine. Increase the speed to medium-high and beat until completely incorporated. Add the condensed milk, evaporated milk, whole milk and vanilla extract and continue to beat together until everything is well incorporated, scraping down the sides of the bowl as necessary, about 2 to 3 minutes.
  • Ladle the custard over the caramel into the ramekins filling them up to 1/2-inch from the rim. In a deep baking dish  place the ramekins in 2 rows. Place the baking dish in the oven and using a pitcher, pour enough hot water into the baking dish to reach halfway up the sides of the ramekins, taking care not to get water in the ramekins.Bake until the flan is just set, about 30 minutes. When you tap the edge of the ramekin the flan should still wobble in the center.
  • Carefully remove the baking dish from the oven and let the ramekins cool slightly. Remove the ramekins from the water and leave to cool. Once cooled completely, the flan can be refrigerated for up to 3 days before un-molding and serving. To serve, run a thin knife around the inside edge of the ramekin to loosen the flan, and then invert onto a plate.


Androulla xx

Stir-fry beef in oyster sauce


This beef stir-fry with oyster sauce is perfect for a mid-week supper. Delicious!!!

Ingredients

For the beef

350g beef fillet
1 tsp light soy sauce
1½ tbsp oyster sauce
pinch sugar
salt and freshly ground black pepper
2 tbsp groundnut oil
3 cloves garlic, finely chopped
1 chilli, de-seeded, finely chopped
200g/7oz baby spinach leaves
1 tbsp dry sherry
pinch dried chilli flakes

For the oyster mushrooms

1 tsp groundnut oil
100g oyster mushrooms
dash balsamic vinegar
dash light soy sauce

Preparation method

For the beef, place the fillet in between two sheets of cling film and bash with a meat mallet or rolling pin until half as thin.

Slice the beef into thin pieces and place into a bowl, then season with the light soy sauce, oyster sauce, sugar and salt and freshly ground black pepper. Set aside.

Heat a wok until smoking and add one tablespoon of the groundnut oil, then add the garlic and chilli. Stir-fry for a few seconds, then add the spinach leaves and toss for a few seconds, until warmed through. Pile onto a large serving plate.

Place the wok back on the heat and add the remaining oil, then add the beef slices and stir fry for 2-3 minutes, or until the beef is cooked to your liking.

Pour in the dry sherry and sprinkle over the dried chilli flakes. Pile the beef over the spinach leaves.

For the oyster mushrooms, heat the oil in the wok and add the oyster mushrooms, stir frying for one minute. Add a small splash of water to create some steam to help the mushrooms cook, then season, to taste, with the balsamic vinegar and light soy sauce.

Spoon the oyster mushrooms over the beef and serve.

Less than 30 mins
preparation time
Less than 10 mins
cooking time
Serves 4

Macaroni Cheese


I call Macaroni Cheese my 'fall back on' recipe. Whenever I have unexpected guests and not enough time for shopping, this is the one for me. Even if I don't have all the ingredients, I will always have the basic ones needed for this ever so comforting dish. Some of the added ingredients in this recipe like the bacon, mushrooms, onion and sundried tomatoes are just ingredients I happened to have in my fridge one day, decided to try them out and found that they just made this very classic dish even more tasty...so basically sometimes it's not about following a recipe but about just getting creative and having fun with in the kitchen!!!

Ingredients

I packet of pasta shapes, I like to use penne
2  tbls butter
2 heaped tbls plain flour
¾ Litre of milk
2 cups of grated cheddar cheese
1 tsp Mustard Powder
1 tsp Nutmeg
Salt and Pepper
1 tbls Olive oil
1 onion,chopped
4 Rashers of streaky bacon,chopped into small pieces
6 pieces of sun-dried tomatoes, chopped
6-7 Mushrooms,chopped
2 Sliced Tomatoes
2 tbls Breadcrumbs mixed with 2 tbls Cheese

Method
· Cook the macaroni in a large saucepan of boiling salted water for 8-10 minutes; drain well and set aside in a large bowl.

· Melt the butter over a medium heat in a saucepan. Add the flour and stir to form a roux, cooking for a few minutes.

· Gradually whisk in the milk, a little at a time. Cook for 10-15 minutes to a thickened and smooth sauce. Add the mustard, nutmeg and cheese,season with salt & pepper and mix well.

· Gently cook onion until transparent, add bacon, mushrooms and sundried tomatoes and cook on a low heat. When cooked drain and mix with the pasta, add cheese sauce and mix well.

· Pour your mixture into a oiled dish, cover with sliced tomatoes and sprinkle breadcumb and cheese mixture on top. Cook in the oven until golden brown.

Enjoy!!!
Androulla xx

Chocolate Trifle

I found this amazing recipe a few years ago in a magazine and has become one of my favourites, even though I don't make it very often it always leaves my guests quite satisfied! You know when you look at something and you know it's bad and sinful through and through and know quite well that it won't end well but still just can't help yourself? Well this is the food version!! Enjoy!!

Ingredients
200g Chocolate brownies
3tbsp Tia Maria or Baileys
225g Dark chocolate
For the custard
3 Egg yolks
25g Caster sugar
1tsp Cornflour
1 x 284ml carton cream
200ml Cream
75g Chopped roasted hazelnuts
Chocolate curls, to decorate
You will need
1 litre trifle dish.

Preparation

· Break up the brownies and scatter over the base of the trifle dish, then sprinkle over the Baileys or Tia Maria.
· Now make the chocolate layer. Break up the chocolate into small pieces and melt in a heatproof bowl over a pan of simmering water without letting the bowl touch the water. Remove from the heat. Boil the kettle and measure out 225ml boiling water. Add the water a dessertspoonful at a time to the chocolate and stir - it will thicken to become a sauce. Don't rush this and add the water too quickly or the mixture will stiffen and curdle. Pour it over the brownies and place in the fridge to set for at least 2 hours.
· For the custard,mix together the egg yolks, sugar and cornflour in a large bowl. Bring the cream just to the boil in a saucepan, then pour it over the egg yolk mixture, whisking all the time. Rinse out the pan with cold water, return the custard mixture to the pan and stir over a gentle heat until thickened; do not allow to boil. Pour the custard into a bowl, cover the surface with clingfilm to prevent a skin forming. When cool, place in the fridge and chill for 2 hours.
· Once the chocolate layer has set, stir the custard well and pour over the chocolate layer. Return to the fridge to set for an hour.
· Lightly whip the double cream and stir in the chopped nuts. Spoon the cream over the custard and return to the fridge until ready to serve. Decorate with chocolate curls.
Usually when I make this I make my custard with milk,,which is still  delicious but this is the original recipe. So I'll leave it up to you!! Enjoy!!

Androulla

Baileys and chocolate cheesecake


The smooth, creamy liqueur gives this celebration cheesecake the wow factor. Top with grated chocolate and a dusting of cocoa.


Ingredients

100g/3½oz butter

250g/8¾oz digestive biscuits, crushed

600g/1lb 5oz Philadelphia cream cheese

25ml/1fl oz Baileys

100ml/3½oz icing sugar

300ml/10½oz double cream, whipped

100g/3½oz grated chocolate To garnish

200ml/7¼oz double cream, whipped

cocoa powder, to dust

Preparation method

Melt the butter in a pan and add the crushed digestive biscuits. Mix well until the biscuits have absorbed all the butter.

Remove from the heat and press into the bottom of a lined 18cm/7in springform tin. Place in the refrigerator and allow to set for one hour.

Meanwhile, prepare the filling. Lightly whip the cream cheese then beat in the Bailey's and icing sugar. Fold in the whipped cream and grated chocolate. When smooth, spoon evenly onto the biscuits.

Refrigerate and allow to set for a further two hours. Once set, remove and decorate with whipped cream and cocoa powder dusted over the top. Serve.


Over 2 hourspreparation time
Less than 10 minscooking time


I hope you give this a try, it really is delicious.

Enjoy


Marilyn x

Thank you for visiting us

The Larnaca Parents Network was designed to generate awareness of local events, activities and facilities for families within the local community.

We openly encourage your original content, events and links for all relevant facilities and services.

Please send all information to: info@larnacaparentsnetwork.com.

You can also share through our Facebook Group.

The information and materials contained on this blog have been compiled from a variety of sources, are subject to change without notice, may not be current and up-to-date, and should not be considered official public records.